Videos
Edit metadata
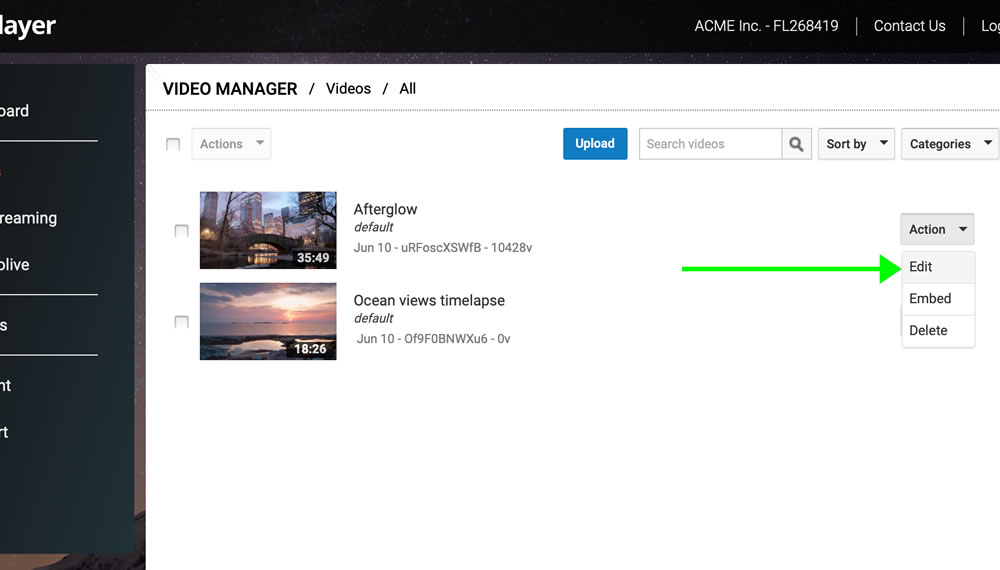
You can edit the metadata variables of your published videos such as their title, description, thumbnail and category by clicking on the "Action" dropdown button at the right side of the corresponding video row, and selecting "Action" -> "Edit".
 A new popup window will open where you can manage the corresponding metadata.
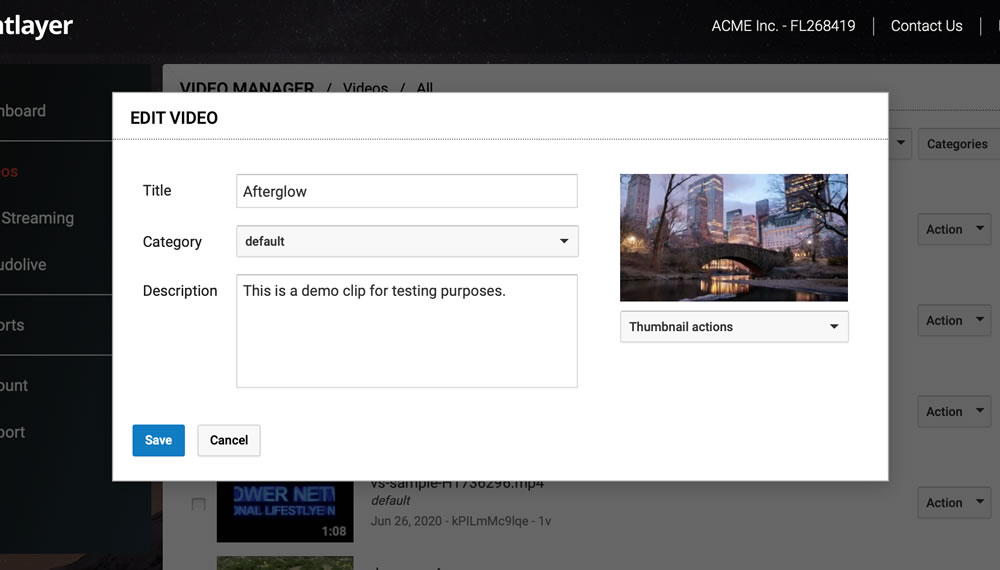 In this example, we can see that the test video has the following metadata variables:
Title -> "Afterglow"
Category -> default
Description -> "This is a demo clip for testing purposes."
Thumbnail -> (the image displayed at the right)
All of these variables can be updated from the web portal.
For the Title and Description variables, you can enter new text directly in the corresponding fields.
For the Category variable, you can select a new one from the list of previously defined categories which are displayed upon clicking on the corresponding drop-down menu.
For the Thumbnail variable, you have the option of either uploading a new custom image to be used as the video's thumbnail ("Upload pic" option), or generating a new thumbnail directly from the web portal ("Live capture" option), by defining a time position which identifies the frame you would like to use as the video's thumbnail (i.e. generate thumbnail from the video frame displayed at 00:27).
In this example, we can see that the test video has the following metadata variables:
Title -> "Afterglow"
Category -> default
Description -> "This is a demo clip for testing purposes."
Thumbnail -> (the image displayed at the right)
All of these variables can be updated from the web portal.
For the Title and Description variables, you can enter new text directly in the corresponding fields.
For the Category variable, you can select a new one from the list of previously defined categories which are displayed upon clicking on the corresponding drop-down menu.
For the Thumbnail variable, you have the option of either uploading a new custom image to be used as the video's thumbnail ("Upload pic" option), or generating a new thumbnail directly from the web portal ("Live capture" option), by defining a time position which identifies the frame you would like to use as the video's thumbnail (i.e. generate thumbnail from the video frame displayed at 00:27).
 The process in each case is as follows.
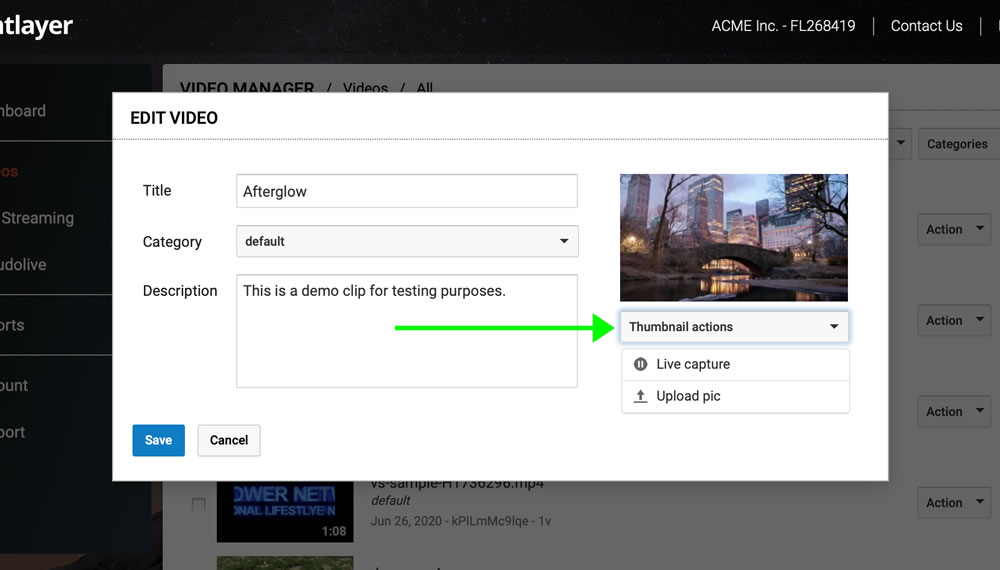
Uploading a new custom image ("Upload pic" option)
1. Click on the "Thumbnail actions" button, which will trigger the dropdown menu. 2. Click on "Upload pic" from the dropdown menu. 3. You will be directed to select a custom image file from your computer. While there are no special requirements for the image you can use, we recommend selecting a high resolution JPG or PNG file, at least 1280x720 pixels. 4. A temporary (unprocessed) version of the image file you selected from your computer will be displayed as a preview, above the "Thumbnail actions" button. 5. Click on "Save" (blue button at the bottom of the interface).
Generating a new thumbnail online ("Live capture" option)
1. Click on the "Thumbnail actions" button, which will trigger the dropdown menu.
2. Click on "Live capture" from the dropdown menu.
3. You will notice that the temporary thumbnail preview is grayed out with the following text "Slide toggle to generate new thumbnail". Below the image, you will notice a timelapse with a toggle allowing you to move to different time positions in the video. Each time you slide the toggle to the right or to the left of the timelapse line, a new preview image will be displayed showing you the actual video frame corresponding to the position you selected with the toggle. Slide the toggle until you find the frame you would like to use as the video's thumbnail, and then click on the "OK" button below the timeline.
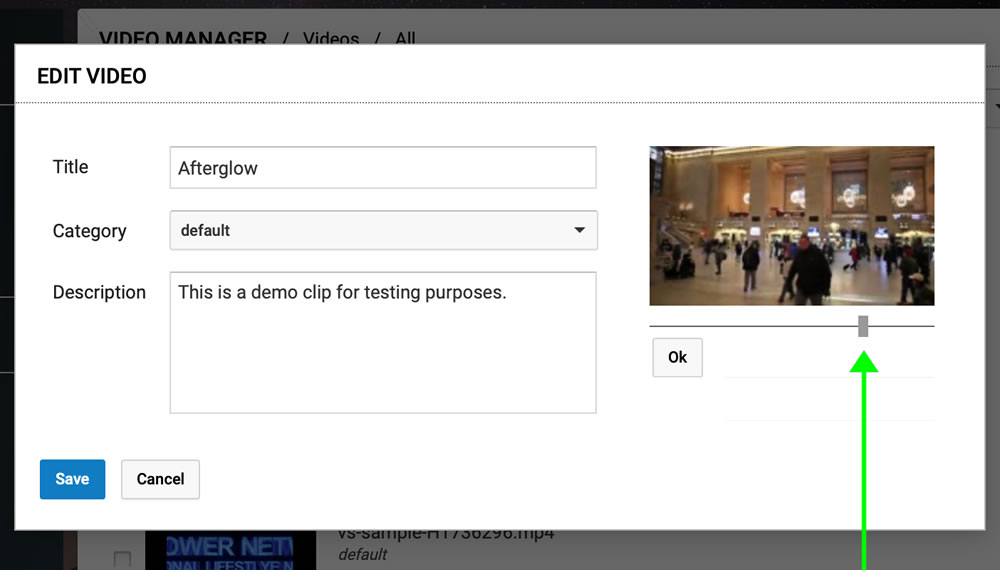 4. Click on "Save" (blue button at the bottom of the interface).

